Need some advise for the dry-firing - what to do in order not to damage the rifle?
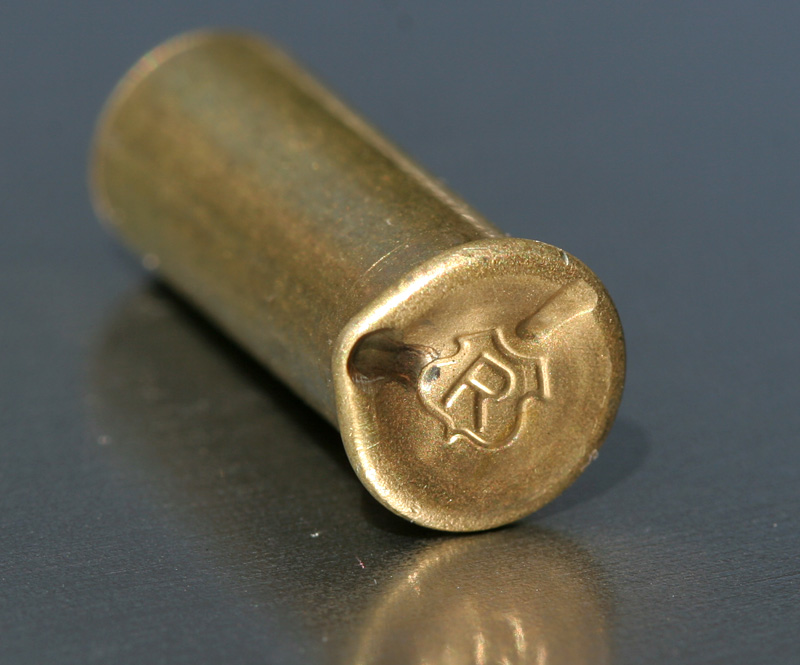
Currently I am using empty cases - put new one, fire 5 times (I do not rotate the case in between - just cock the bolt and do not extract the case - so all 5 hits are going in the same place), then discard.
Some inconveniences - cases are dirty and have burned powder residue; and sometimes it's really difficult to insert them into the chamber - reaching and trying to squeeze it in doesn't help to keep the position.
Should I use training pin instead? Or get a new firing pin and shorten it so it would not reach the chamber?
Rifle is Anschutz 1411.
If you're going to do a lot of dry firing, you can probably get a firing pin and grind the tip down.Last I checked you could get a normal firing pin for a bit cheaper than a dry firing pin, but things may have changed. A couple years ago I got 2 firing pins from 10 ring, but had to talk them into sending the firing pins to me because they REALLY wanted to fit the pins themselves (and charge me for it).
I'dlike to state something about the spesific snap caps.
I maybe used them wrong but here is what I did.
Fell down for some SCATT prone and loaded a snap.
I used the same snap for at least 4 match practise and it eventually broke...
Maybe I should "round robin" them?
Anyway,a friend shooter who also does a lot of sim advised me to not cock tha action completely.
I tryed it(with a snap loaded just to see any marks from the pin) and it works!!!
Here is what you must do:
Do all the loading procedure.
When it comes to close the bolt,don't close it completely,close it about 1/3 of the way.
Trigger works and instead of pin firing,yhe bolt just closes all the way!!!
Give it a try!
This partial cocking technique you desribe sounds VERY bad!
When you lower the bolt handle say 1/3 of the way and release the trigger, the lug on the firing pin that is used for cocking slams down onto the cocking cam in the bolt. This becomes two hardened metal surfaces that were not designed for impact, being allowed to impact on each other. Doing this routinely can ultimately damage the cam surface making the cocking action when you lift the bolt handle rough, if not in extreme cases impossible to do. If this happens it can be rather pricey to repair.
I will also add that if you are shooting an Anschutz, the cocking cam is not the most robust part of the typical Anschutz bolt.
I know there are problems with Snap Caps, and also with shortened "dry firing" firing pins breaking but dealing with that is way cheaper than repairing or replacing bolts.
justadude wrote:I know there are problems with Snap Caps, and also with shortened "dry firing" firing pins breaking but dealing with that is way cheaper than repairing or replacing bolts.
I've red about snap caps that they break down quite fast - e.g. after 20-30 shots.
So is shortened firing pin the best solution?
The question about the best solution for dry firing is a tough one.
First, realize that the action on your typical 22 target action is a very simple device and is designed with one purpose in mind: To very delberately and repeatably crush a primer encased in a brass capsule. To this end, when you lift the bolt handle you store a surprising amount of energy. The firing pin, when released, directs that energy on a rather small area.
With all this going on, without proper cushions (crushable brass case) in place, parts in a bolt have the potential to inflict a fair amount of damage on each other. For this reason I am not really a big fan of shortened "dry firing" pins. When the short pin is released somewhere inside that bolt body two steel surfaces bang into one another.
This gets me back to spent brass and snap caps. When I started shooting in the early 70s there was no such thing as the snap cap. You used spent brass. Yes there is the problem that bits of burned primer and powder will be broken loose and displaced into the bore. Also, the square nose of the empty case does not fit into the chamber all that easily. The solution for the first problem was when you were finished push a wet patch to two down the bore and it cleaned out easily. You are correct, don't want to run a bullet down the bore with the primer dirt in it. As for the casing not going in easily, first, save cases fired only from your rifle and second, you just kind of get used to it. After a while, replacing the spent case becomes habit just like reloading during live fire.
As for snap caps. Yes, they break down after a few hits. The do however have round noses on them so they are easier to reload so you can cycle them through too. Now lets say that snap caps cost about 30 cents each and you get ten hits (probably more but I am trying to make this simple) on them. (just some quick math) That is 3 cents per dry fired shot. Not too terrible. However, I can go to my basement and shoot my air rifle for about 1.5 cents a shot and I get a real hole in the target to look at when I am done. If you have an air rifle you might want to consider that route.
For the time being, IMHO, there is lots to be said for spent cases and cleaning the bore when you are done.
Just to give you and other folks who have look at this thread an idea of what is going on in the bolt in the cocked, third cocked and uncocked I have taken a few pictures of the cocking lug/cocking cam area of an Anschutz bolt. To get these pictures I took the bolt apart and removed the little "beauty ring". This is one part of the bolt that is entirely cosmetic and while it looks funny the bolt will function just fine without it.
Attachments
Picture of the cocking cam and lug in the position that most people are used to seeing them in the cocked position. This is the position they must be in to insert the bolt into the action.
By removing the springs from the bolt I was able to get the cocking cam and lug in about the relationship they would be in when the rifle is dry fired with the bolt one third closed. This would be at the time of impact. As you noted, once the pin is rel
This is the bolt in the uncocked position. This is the typical releation of the cocking cam and lug when you are getting ready to disassemble the bolt. For this picture I have placed a short piece of 0.020" diameter wire between the lug and base of
Yellow ribbed plastic anchors, #4-6x7/8". $3 per 100 Load like a cartridge, multiple strikes before used up, extract like empty brass, NO primer residue! Find at any hardware, home depot.
willy
I use snapcaps for training.I treat each session like a competition.Load -routine- fire etc then unload.By completely loading and unloading each cap the next time I load them they should get a hit in a different place.This helps them last longer and makes training more realistic.
I just finished a prone practice and I did the same thing like Gerald.
(strinks of 10 cause I had to gather the caps again!!!)
I think I'll keep up with caps,therefore I must buy some more!
A quick and dirty way to prevent a firing pin break is to change the firing pin spring for another that has less coils (remove one quarter from full length). that way, the firing pin will hit its mechanical stop with less energy. I've been doing that for a long time without failure. Only drawback is if you are dry firing on a simulator, you will see longer delays when you break the shot (increased L factor on a scatt). No big deal, in fact it helps to keep you aware of follow through.
BTW, if you are concerned about grit coming out of the spent cases, just stuff them with a piece of tissue. Easy fix.